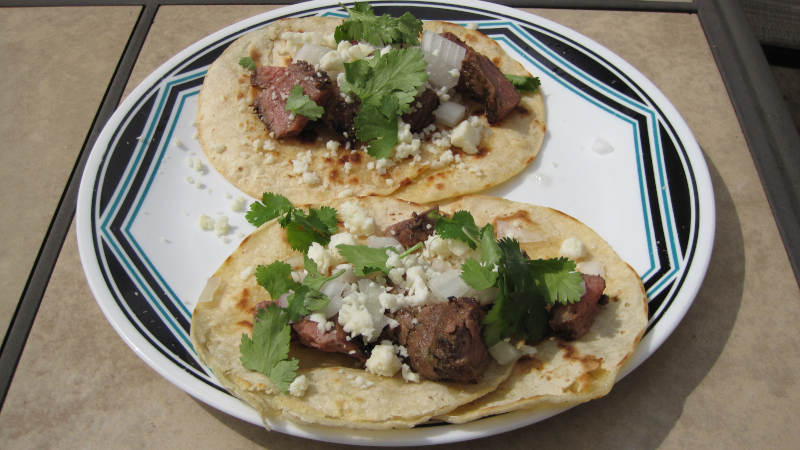
Oven Baked Turkey Meatloaf
This recipe takes the wholesome goodness of ground turkey and elevates it to new heights, creating a flavorful and comforting dish that will have your taste buds dancing.
At the heart of this creation is 2 pounds of lean ground turkey, a canvas ready to absorb a symphony of flavors. As we dive into the process, you’ll witness the marriage of ingredients like breadcrumbs, a single egg, and a touch of half n half, working together to create a meatloaf that’s not only moist and tender but also full of delightful textures.
The flavor journey continues with the aromatic dance of onions, garlic, and a medley of herbs including thyme and sage. A dash of mustard powder, black pepper, and a hint of cayenne pepper add layers of depth, creating a profile that’s both savory and subtly spicy.
But what truly sets this meatloaf apart is the tangy glaze that will grace its surface. A magical blend of tomato paste, ketchup, balsamic vinegar, Worcestershire sauce, and Dijon mustard will be brushed on top, creating a caramelized finish that’s both sweet and tangy. It’s the crowning glory that takes this meatloaf from ordinary to extraordinary.
As this delectable creation bakes in the oven, the tantalizing aroma will fill your kitchen, building anticipation for the flavorful experience to come. Whether you’re cooking for a family dinner or looking to impress guests, our Oven-Baked Turkey Meatloaf with Tangy Glaze is a delicious journey that promises satisfaction in every bite.
Man That’s Cooking
Ingredients
- 2 pounds ground turkey
- 1 egg
- 1 cup breadcrumbs
- 1 small yellow onion
- 3 minced garlic cloves
- 1/4 cup half n half
- 1 tbsp Worcestershire sauce
- 1 tsp kosher salt
- 1/2 tsp thyme
- 1/2 tsp ground sage
- 1/2 tsp mustard powder
- 1/4 tsp black pepper
- 1/4 tsp white pepper
- 1/4 tsp cayenne pepper
Glaze Topping
- 8 oz tomato paste
- 1/2 cup ketchup
- 2 tbsp balsamic vinegar
- 1 tbsp Worcestershire sauce
- 2 tbsp dijon mustard
Directions
First dice and sauté the onion on medium heat with a splash of cooking oil. Cook for a few minutes then add the minced garlic and cook for one more minute.
In a large mixing bowl, add the egg, milk, Worcestershire sauce and dry seasonings. Whisk this mixture together then add the turkey, onions, garlic and breadcrumbs. Thoroughly mix together these ingredients for 1 to 2 minutes.
For the glaze sauce, combine in a small bowl the tomato paste, ketchup, Worcestershire sauce, and dijon mustard. Whisk together the ingredients thoroughly. Set aside 1/4 of the glaze in a small container for later as there will be enough for extra on the side.
Place a sheet of aluminum foil on a cookie sheet. Transfer the turkey mixture to the center of the cookie sheet and form it by hand into a bread loaf shape. Next generously brush on the glaze sauce on all surfaces of the meat loaf.
Bake the meatloaf at 365 F for 1 hour or until the internal temperature reaches between 162 F – 165 F. Remove the meatloaf from the oven and allow it to rest for at least 10 minutes before slicing.
After cooling, slice into 1 inch portions. Serve with the set aside glaze sauce if desired.
Print This Recipe
Watch How To Make This Recipe
Pellet Smoked Prime Rib
In this recipe, we’re diving into the world of sumptuous flavors and savory indulgence with our Pellet Smoked Standing Rib Roast. This 7-pound marvel, featuring three glorious rib bones, is about to take center stage in a masterful symphony of smoke, fire, and seasoning.
As we fire up the smoker, this rib roast will undergo a transformation that’s nothing short of spectacular. Over the course of four tantalizing hours, it will absorb the smoky essence from the gentle, controlled heat of the pellet smoker, infusing it with a depth of flavor that’s simply unmatched.
But the magic doesn’t end there. A bold and aromatic rub, crafted from a blend of salt, pepper, dry rosemary, thyme, garlic powder, onion powder, mustard powder, and paprika, will enrobe this beautiful cut of meat. This ensemble of seasonings will work in perfect harmony, setting the stage for a taste experience that’s rich, fragrant, and utterly delicious.
After its slow dance with the smoker, we’ll crank up the experience even further. The reverse sear over the fiery heat of the BBQ grill will put the final touches on this culinary masterpiece. The intense heat will create a beautiful crust, encapsulating all the juicy tenderness within, and imparting a delightful char that’s the epitome of flavor.
The Pellet Smoked Standing Rib Roast isn’t just a dish; it’s an experience. Whether you’re planning a festive gathering, a holiday feast, or simply seeking to create a culinary delight that will leave a lasting impression, this roast is your ticket to an unforgettable dining experience.
Man That’s Cooking
Ingredients
- 6 – 7 pound standing rib roast
- 3 tbsp kosher salt
- 2 tbsp black pepper
- 1 tbsp garlic powder
- 1/2 tsp onion powder
- 1/2 tsp paprika
- 1/2 tsp mustard powder
- 1/2 tsp sage powder
- 1/2 tsp thyme
- 1/2 tsp rosemary
- 1/4 cup worcestershire sauce
Directions
First, use a chef’s knife and remove the rib bones by cutting along the bones to separate them from the roast. Keep the bone plate in one piece so they can be tied back in place after applying rub on all sides of the roast and rib plate.
Next, carefully and lightly shave off any hard fat from the fat cap and remove any surface silver skin. This is an optional step as most roasts will be cleaned up by the butcher. But if you do trim, leave at least 1/4 inch of fat cap on the top of the roast. Next, carefully slice a cross hatch pattern in the fat cap by only slicing the fat and not the meat.
Next generously apply kosher salt on all sides of the roast. Place the roast on a cooling rack on a cookie sheet to allow for airflow underneath the roast. Place this in the refrigerator for at least 24 hours and up to 4 days. This will dry brine the roast adding flavor to the meat while also tenderizing it.
After 24 hours of dry brine, remove the rib roast from the refrigerator and keep it on the cooling rack. Prepare the dry rub by combining all the spices and seasonings listed. Apply a thin layer of Worcestershire sauce on all sides of the roast and the detached rib plate. Generously apply the dry rub on all sides of the roast and rib plate.
Place the roast back on top of the rib bone plate. Using butcher twine, tie the rib plate back in place with a loop between each rib bone. The rib plate will act as a heat shield while the roast is on the smoker. This will help roast cook more evenly and they can be quickly detached for the reverse sear step.
Preheat your smoker to 220 F using lighter blended pellets such as competition blend. When the smoker reaches temp, place the rib roast bone side down in the center of the smoker, on the bottom rack. Insert a temperature probe directly into the center of the roast. Set the temperature alarm to 125 F. Smoke for roughly 4 hours until the temp alarm triggers or the roast center reaches 125 F.
Remove the roast from the smoker and loosely cover it with aluminim foil. Allow it to rest for 30 minutes so that the juices settle in the roast and it’s temperature lowers. While the roast is resting, preheat your grill with the burners on high or for charcoal, light one starter chimney of charcoal or lump.
Cut the twine and remove the rib plate from the roast. Sear it for 3 – 5 minutes per side on all sides. Do not close the grill lid and do not walk away. Judge the sear doneness by color and if you need to sear one or more sides longer do so to your desired doneness. Place the rib plate on the grill and cook it 3 – 5 minutes per side. After searing, let the roast rest 5 – 10 minutes then slice and serve. Slice between the rib bones to separate them and enjoy them along with delicious slices of prime rib.
Print This Recipe
Watch How To Make This Recipe
Chick-Fil-A Style Breakfast Burrito
Embrace the joy of mornings with a delightful breakfast creation that’s sure to kickstart your day with a burst of flavor! Today, we’re crafting Chicken Breakfast Burritos inspired by the beloved flavors of Chick-fil-A. These burritos are a celebration of morning comfort, deliciousness, and the convenience of a grab-and-go breakfast that feels just like a treat.
At the heart of this breakfast adventure are tender and succulent chicken bites – reminiscent of that Chick-fil-A goodness. We’re pairing them with crispy crowns, adding a crunch that perfectly complements the softness of the eggs, cheese, and tortilla. These ingredients harmonize in a way that’s undeniably comforting and satisfying.
The genius of these breakfast burritos lies not only in their homage to the Chick-fil-A style but also in their convenience. They’re an embodiment of delicious breakfast comfort, ideal for those hectic mornings when you need a wholesome meal that’s quick, hearty, and oh-so-satisfying.
Man That’s Cooking
Ingredients
- 12 eggs
- 1/2 cup half and half
- 24 oz bag Just Bare chicken bites
- 15 oz crispy crowns
- 8 oz shredded colby jack cheese
- 10 inch flour tortillas
- 32 oz Mateo’s gourmet salsa
Directions
First, cook the chicken bites in the air fryer half a bag at a time. If your air fryer basket can hold the entire bag at once, go for that. Cook at 360 F for 7 minutes, then give the basket a good shake, then cook for another 7 minutes at 360 F. Repeat this for the other half of the bag.
Next, cook half a bag (15 oz) of crispy crowns at 360 F for 7 minutes. Give the basket a good shake, then cook for another 7 minutes at 360 F.
Next crack open 12 eggs into a large mixing bowl. Crack each egg over a small cup so that if any shell bits fall into the cup, it will be easier to get the shell out from there rather than a large mixing bowl full of eggs.
Whisk in 1/2 cup of half and half while mixing the eggs thoroughly.
Cook the eggs in a large skillet on medium heat until they are fluffy and scrambled. You may need to do this in 2 batches or you can run 2 large skillets at the same time.
Build each breakfast burrito by scooping egg onto a flour tortilla. Add shredded colby jack cheese followed by chopped chicken bites then crispy crowns. Roll the burrito shell and wrap it in foil.
Print This Recipe
Watch How To Make This Recipe
Rosemary Romano Mashed Potatoes
Today, we’re delving into the world of comfort food with our Rosemary Romano Mashed Potatoes. This recipe takes the humble potato and transforms it into a luxurious side dish that’s rich, creamy, and infused with the aromatic magic of fresh rosemary.
At the heart of these mashed potatoes are the russet potatoes themselves, a starchy wonder that becomes the perfect canvas for our culinary creativity. But what truly sets this recipe apart is the combination of savory Pecorino Romano cheese, which adds a salty and nutty depth, and crispy diced pancetta that provides a delightful contrast of textures and a burst of flavor.
To achieve that luxurious creaminess, we’ll enlist the help of two dairy champions: unsalted butter and heavy whipping cream. They’ll melt together into a silky indulgence that will make your taste buds sing. And for that extra touch of tang and richness, we’ll introduce sour cream, creating a harmonious balance of flavors.
The star of the flavor show, however, is the fragrant and earthy fresh rosemary. As it dances through the potatoes, it will infuse them with a tantalizing aroma and a hint of piney sweetness, creating a symphony of flavors that will leave you craving more.
Whether you’re planning a holiday feast, a Sunday dinner, or simply want to turn an ordinary weeknight into something extraordinary, these Rosemary Romano Mashed Potatoes are your ticket to culinary bliss. Get ready to impress your family and friends with a side dish that’s not just food; it’s a warm, comforting embrace on a plate.
Man That’s Cooking
Ingredients
- 4 pounds russet potatoes
- 8 oz pecorino romano cheese
- 4 oz diced pancetta
- 1 stick unsalted butter
- 1 cup heavy whipping cream
- 1 cup sour cream
- 3-4 sprigs fresh rosemary
Directions
First, peel the potato skins then cut them into 2 inch cubes. Make sure all cubes are roughly the same size so that they cook evenly. Place the potatoes in a large pot, then add 1 tablespoon of salt, and submerge them with cold water. Next, bring everything to a boil over high heat and then reduce the heat to medium low, maintaining a simmer. Cook the potatoes for 15 to 25 minutes until they are tender and break apart when stuck with a knife or fork. Drain the potatoes in a colander and let them sit for 5 minutes. Return them to the pot on a low heat for a few minutes to evaporate off excess moisture.
While the potatoes are cooking, finely mince the rosemary and hand shred the cheese.
In a skillet on medium heat, cook the pancetta for roughly 10 minutes until they turn brown. Remove them from the pan and place them on paper towels to absorb the grease. Safely drain the grease from the pan into a jar. Next, melt the butter in the pan over medium heat. Reduce the heat to medium low, then slowly add in the heavy whipping cream and sour cream. Add the rosemary then a minute later remove the skillet from the heat.
Use a potato masher to break down the potato chunks or use a potato ricer and finely mash them into the pot. Slowly fold the butter cream mixture into the potatoes and mix everything together. Finally add in the grated Romano cheese and mash or mix for another minute. If the potatoes seem dry, add 1/4 – 1/2 cup of whipping cream and 1/4 – 1/2 cup of sour cream to moisten up the mashed potatoes.
Print This Recipe
Watch How To Make This Recipe