Pollo Tropical Verde Asado

Pollo Tropical Verde Asado

Get ready to bring the vibrant flavors of the tropics to your backyard with our Pollo Tropical Verde Asado. This grilled chicken recipe is a feast for the senses, combining a zesty and aromatic marinade with the irresistible taste of smoky, char-grilled goodness.

The secret to this dish lies in its delectable marinade, a harmonious blend of red onion, garlic, jalapeños, cilantro, lime juice, orange juice, pineapple juice, olive oil, and brown sugar. These ingredients come together to create a marinade that’s bursting with flavor, balancing tangy citrus, sweet pineapple, and a hint of heat from the jalapeños. This tantalizing mix not only tenderizes the chicken but infuses it with a depth of flavor that’s truly unforgettable.

Once the chicken has luxuriated in this flavorful bath for at least six hours, it’s ready to hit the grill. Cooking over indirect heat with lump charcoal ensures the chicken cooks evenly, while an apple wood chunk adds a subtle, sweet smokiness that elevates the dish to new heights. The result is perfectly juicy, tender chicken with a beautifully charred exterior that’s infused with the essence of the tropics.

Perfect for a summer barbecue or a family dinner, this Pollo Tropical Verde Asado is more than just a meal—it’s an experience. So fire up the grill, gather your ingredients, and get ready to savor a taste of the tropics right in your own backyard.

Ingredients

  • 1 lime juiced
  • 1 orange juiced
  • 1 cup pineapple juice
  • ½ cup red onion
  • ½ cup cilantro leaves
  • 4 garlic cloves
  • 2 jalapeno peppers
  • ¼ cup olive oil
  • 1 tbsp white vinegar
  • 1 tsp brown sugar
  • 1 tsp kosher salt
  • ½ tsp black pepper

Print This Recipe Print This Recipe

Directions

First, dice 1/2 cup of red onion and add this to the blender. Next, roughly chop 4 large garlic cloves and add this to the blender. Next, remove the seeds and chop 2 jalapeno peppers then add this to the blender. Then add 1/2 cup fresh cilantro leaves to the blender. Add the lime, orange, and pineapple juice, along with the oil, vinegar, sugar and seasonings.


Run the blender on high for at least 1 minute. Pour the marinade over one chicken split in halves or quarters and coat all sides with the marinade. Let the chicken marinate in the refrigerator for at least 4 hours but no more than 12.


Setup indirect cooking zones by having lit charcoal on one side of the grill, and leave a cool zone to cook the chicken over. When the charcoal is heated, maintain 300 F, then sear the chicken over the direct heat for 1 – 2 minutes per side. This will brown the outer edges and sear part of the skin. Move the chicken to the cool zone and place the thighs and dark meat facing the hot zone. Cook until the breast meat reaches 165 F and 175 in the thigh which should take roughly 2 hours.


When the chicken reaches temp, place it on a cutting board and let it rest for 10 minutes. Carve the chicken and enjoy!

Print This Recipe Print This Recipe

Watch How To Make This Recipe


Turkey Burgers on Weber Q2200
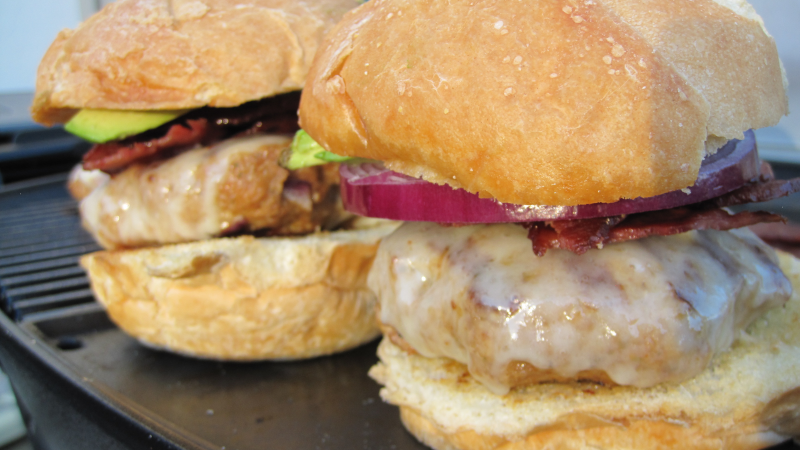
Turkey Burgers on Weber Q2200

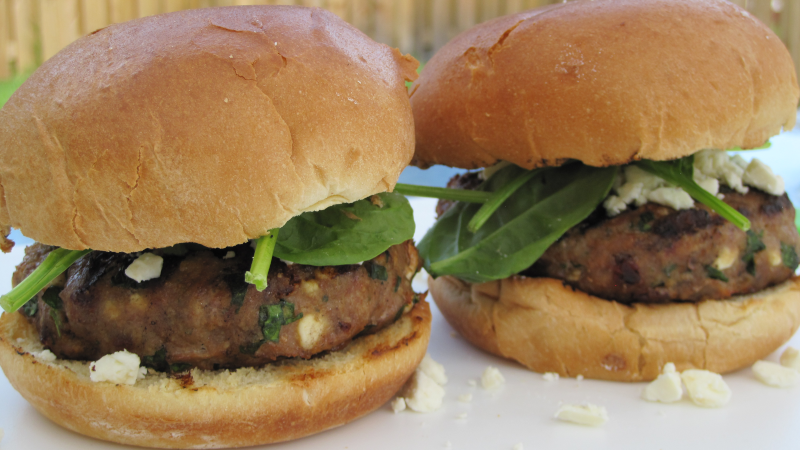
Get ready to elevate your burger game with our mouthwatering Grilled Turkey Burgers, cooked to perfection on the versatile Weber Q2200 portable grill. This recipe combines the juicy, flavorful goodness of turkey with a medley of savory ingredients and delicious toppings, creating a burger experience that’s both satisfying and unforgettable.

Our turkey burger mixture is a blend of lean ground turkey, Italian bread crumbs, grated red onion, minced garlic cloves, egg, paprika, mustard powder, salt, pepper, and Worcestershire sauce. These ingredients come together to form patties that are packed with flavor and perfectly juicy, making every bite a delight.

Once the patties are formed, they’re grilled to perfection on the Weber Q2200 portable grill, a grill known for its compact design, powerful performance, and even heat distribution. This makes it an ideal choice for grilling burgers, whether you’re at home, tailgating, or enjoying a picnic in the park.

But we don’t stop at just grilling the patties. These turkey burgers are served on toasted Kaiser roll buns, brushed with melted butter and browned on the Q2200’s griddle insert for an extra layer of flavor and crunch. Topped with melted Swiss cheese, crisp red onion slices, creamy avocado slices, and smoky turkey bacon (also cooked on the griddle insert), these burgers are a symphony of textures and tastes.

The Weber Q2200’s versatility truly shines in this recipe, allowing you to grill the turkey patties to perfection, cook the turkey bacon on the griddle insert, and toast the buns all in one compact, portable grill. It’s the perfect tool for achieving restaurant-quality results in a variety of settings.

Ingredients

  • 1 pound ground turkey
  • 1 egg
  • ¼ cup Italian bread crumbs
  • ¼ cup grated red onion
  • 2 minced garlic cloves
  • ½ tsp kosher salt
  • ½ tsp Italian seasoning
  • ¼ tsp paprika
  • ¼ tsp mustard powder
  • ¼ tsp black pepper
  • 1 ½ tsp Worcestershire sauce
  • 4 slices swiss cheese
  • 8 slices turkey bacon
  • 4 Kaiser roll buns

Print This Recipe Print This Recipe

Directions

In a large mixing bowl, mix together the ground turkey, egg, bread crumbs, grated red onion, minced garlic, seasonings, and Worcestershire sauce.


Shape the turkey mixture into 4 equal sized patties.


Preheat the grill with a griddle insert for cooking bacon. If using turkey bacon, add about 1 tsp of cooking oil to the griddle.


Once the griddle side reaches at lease 500 F, add the turkey bacon slices, then add the turkey burger patties to the grill side. Close the lid and continue to cook.


After 5 minutes, flip the bacon and the turkey burger patties then close the lid. If you have a cast iron sauce pan, add 1 tablespoon of butter to the pan and place it on the grill to melt the butter.


After another 5 minutes, add swiss cheese to the burger patties. Brush on melted butter on the buns and place them on the griddle after moving the turkey bacon aside.

Print This Recipe Print This Recipe

Watch How To Make This Recipe


Tacos Carne Asada

Tacos Carne Asada

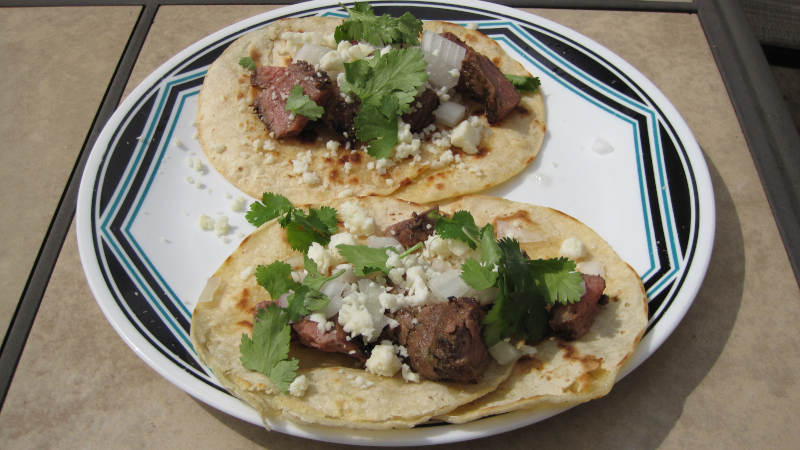
Get ready to fiesta like there’s no mañana with our mouthwatering Tacos Carne Asada, a celebration of flavor, fire, and fiesta perfect for Cinco de Mayo and beyond! This festive dish pays homage to the vibrant culinary traditions of Mexico, combining succulent grilled flank steak marinated in zesty lime and orange juice with a tantalizing blend of jalapeño, cilantro, and garlic.

These tacos are a celebration of texture and taste, with each element carefully curated to create a symphony of flavors. Topped with diced white onion for a crisp bite, fresh cilantro for a burst of brightness, and crumbled cotija cheese for a creamy finish, every bite is a party on your palate.

As you gather with friends and family to celebrate Cinco de Mayo, our Tacos Carne Asada are sure to steal the show and ignite your taste buds with the spirit of Mexico. So fire up the grill, grab your favorite cold beverage, and get ready to savor the festive flavors of Cinco de Mayo with our irresistible Tacos Carne Asada.

Marinade

  • 1 lime juiced
  • 1 orange juiced
  • 1 jalapeño pepper
  • 4 garlic cloves
  • 1/2 cup cilantro
  • 1/4 cup olive oil
  • 1/2 teaspoon salt
  • 1/4 teaspoon black pepper
  • 2 tablespoons white vinegar

Tacos

  • 2 – 3 lb flank steak
  • 10 oz cotija cheese
  • 1 white onion
  • 1 avocado
  • 30 corn tortilla shells

Print This Recipe Print This Recipe

Directions

First, peel and rough cut 4 cloves of garlic and add them to a blender.


Next, squeeze the juice from one orange and one lime into the blender


Next, wash and pick 1 1/2 cups of cilantro leaves. Put 1/2 cup into the blender, then hand chop the remaining 1 cup of cilantro for toppings and place that in a container for the refrigerator.


Next, slice a jalapeño pepper and add it to the blender. Add the salt, pepper, and vinegar. Blend on high for 30 seconds then bring to a low for 1 minute.


Pour the marinade from the blender over the flank steak in a container or a gallon zip seal bag. Coat the steak with marinade on all sides then place it in the refridgerator for at least 12 hours but not over 24 hours.


For taco toppings, peel and dice a white onion and add it to a container for storage. Dice a white cheese such as cojita and store in the refrigerator.


Preheat your gas grill or fire up your charcoal and setup a cool zone for indirect cooking. So for gas grills turn off a burner on one side leaving the other on. For charcoal stack the coal on one side of the grill. Next place the flank steak on the hot zone with the fire and cook for 1 – 2 minutes per side with the lid open. Next move the steak to the cool zone and close the lid. Cook for about 10 minutes then finish the steak over the hot zone. Flip after 1 – 2 minutes to build a nice sear on both sides. Cook until the center reaches 135 F then remove and rest for 5 minutes.


Next, add tortillas on the hot zone for 1 – 2 minutes each side and then remove. While heating up the tortillas, chop the steak into small chunks. When the tortillas are done, assemble the tacos by placing 2 shells partially overlapped. Add the chopped steak, onion, cilantro, queso, and avocado. Squeeze a lime over the taco and enjoy!

Print This Recipe Print This Recipe

Watch How To Make This Recipe


Grilled Marinated Skirt Steak Fajitas

Grilled Marinated Skirt Steak Fajitas

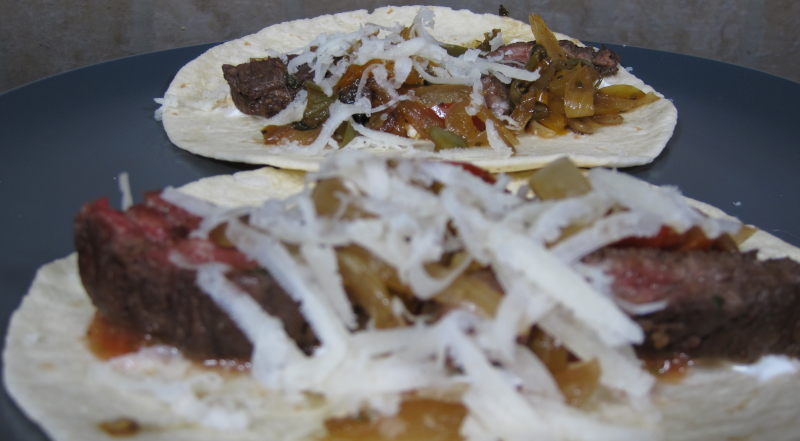
Get ready to tantalize your taste buds with an explosion of savory and zesty flavors! Today, we’re bringing you an absolute Tex-Mex favorite – Grilled Marinated Skirt Steak Fajitas. This dish is a celebration of tender, marinated skirt steak, perfectly complemented by a medley of colorful bell peppers and onions, all cooked to perfection on the grill.

The heart of this recipe lies in the mouthwatering marinade we’ve carefully crafted. It’s a symphony of flavors, combining the richness of soy sauce, the tangy brightness of lime, and the fresh aroma of cilantro. To add a kick of spice and depth, we’ve infused it with chili powder and cumin, along with the bold punch of jalapeno pepper and onion.

Once the skirt steak has been marinating and soaking up all those fantastic flavors, it’s time to hit the grill! As the sizzling sounds fill the air, the tantalizing aroma will surely draw a hungry crowd. Prepare for an irresistible combination of smoky charred edges and juicy tenderness that will have you craving more with every bite.

Now, let’s talk about those colorful bell peppers and onions. Grilling them adds a delightful smokiness, while their vibrant hues bring a visual feast to your plate. Once cooked to perfection, they join forces with the marinated skirt steak to create the perfect filling for our fajitas.

When it’s time to assemble, grab those soft flour shells and load them up with the grilled marinated skirt steak and the colorful pepper and onion medley. The combination of textures and flavors is a true fiesta for your taste buds.

Ingredients

  • 2 pounds outside skirt steak
  • 1/4 red onion
  • 1 yellow onion
  • 1 red bell pepper
  • 1 green bell pepper
  • 1 yellow bell pepper
  • 1 jalapeno pepper
  • 1/2 cup cilantro
  • 2 garlic cloves
  • 1 lime
  • 1/2 cup corn oil
  • 1/4 cup soy sauce
  • 3 tsp chili powder
  • 2 tsp cumin
  • 1 tsp chili powder
  • 10 fajita shells
  • 6 oz Monchego cheese

Print This Recipe Print This Recipe

Directions

First step is to make a marinade for the skirt steak. Finely chop 1/4 red onion and 1 jalapeno pepper with the seeds removed. Combine this in a container or zip seal bag with 1/4 cup chopped cilantro, 2 minced garlic cloves, 1/2 cup corn oil, 1/4 cup soy sauce, juice of 1 lime, 3 teaspoons chili powder, 2 teaspoons cumin, and 1 teaspoon black pepper.


Next cut the skirt steak into 3 even parts, then add the steak to the marinade. Coat all sides with the marinate and place it in the refrigerator for 4 – 6 hours.


Next prepare the veggie mix by slicing the bell peppers and the yellow onion and place this into a large mixing bowl. Add 1/4 cup of chopped cilantro, roughly 1 tablespoon of corn oil, 3/4 teaspoon of chili powder, 1/2 teaspoon cumin and 1/2 teaspoon of black pepper. Mix everything together for a few minutes until the veggies are evenly coated.


Preheat your grill with one side on a medium heat and the other on a medium high heat. Place a 12 inch cast iron skillet or a metal grill basket over the medium heat side. After about 5 – 10 minutes, add some corn oil to the skillet or rub down the grill basket with oil. Add the veggies and cook them for about 5 minutes then add the steak to the medium high side of the grill. Keep the lid open and grill the steak for about 10 minutes flipping it over a few times. Stir the veggies around every few minutes. Pull the steak from the direct heat when it reaches 130 F.


Let the steak rest for at least 5 minutes, then slice it against the grain so that each bite is tender. To do this, check the steak and you should be able to see lines and cracks running from the width of the steak. You want to cut at 90 degrees from those lines, so turn the steak to the side and slice against those lines instead of with the lines.


Warm Flour Shells: Begin by heating your soft and pliable flour shells. You can do this by wrapping them in foil and placing them on the grill for a minute or two. Alternatively, a quick warm-up in the microwave works just as well.


Lay down a generous portion of the marinated and perfectly grilled skirt steak in the center of your warm flour shell. The juicy, flavorful goodness will be the star of your fajita creation.


Next, load up your fajita with the beautifully grilled bell peppers and onions. The vibrant colors will not only make your fajitas look enticing but also add a delightful crunch and sweetness to each bite.


Now, it’s time to customize your fajitas with your favorite toppings. Whether you’re a guacamole aficionado, a salsa lover, or can’t resist a dollop of creamy sour cream – feel free to go all out! Shredded cheese, fresh cilantro, or a squeeze of lime juice will also add an extra layer of yumminess.


Carefully fold one side of the flour shell over the filling, then fold in the sides to secure the delicious contents. Roll it up, and voilà! Your fajita masterpiece is ready to be devoured.

Print This Recipe Print This Recipe

Watch How To Make This Recipe