Slow Cooker Mock Tender Roast

Slow Cooker Mock Tender Roast


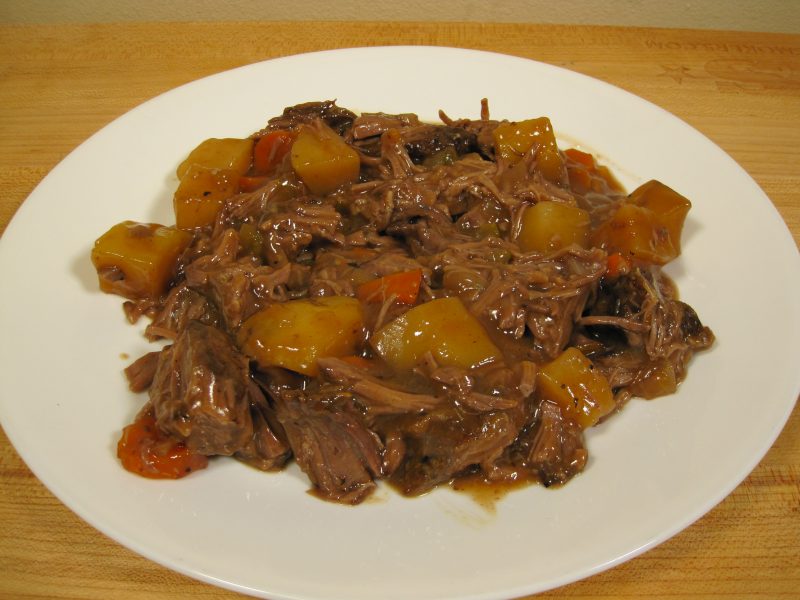
Mock tender roast may be an overlooked cut, but when treated right, it becomes a wallet-friendly, deeply satisfying centerpiece. This slow cooker version transforms the humble roast into a comforting dish layered with flavor. A quick sear adds depth, while a slow braise surrounded by classic pot roast vegetables brings everything together into a rustic, hearty meal.

The true star here is the low-and-slow method, coaxing tenderness out of a lean cut with every hour. Onions, garlic, carrots, celery, and Yukon gold potatoes soak up the seasoned broth, while a simple cornstarch slurry finishes the dish with a glossy gravy. You’ll get all the classic flavors of pot roast, with less fat than chuck and plenty of flexibility.

Real-world results show that this roast holds up well even when prepped the night before, and while the crockpot won’t get your gravy hot enough to thicken properly, a quick transfer to the stovetop solves the issue fast. Consider this a go-to for Sunday dinners or busy weeknights—one cook and you’ll be hooked.

Ingredients

  • 2.5 pounds mock tender roast
  • 2 tbsp olive oil
  • 1 tsp salt
  • 1/2 tsp black pepper
  • 1 tsp garlic powder
  • 1 tsp onion powder
  • 1/2 tsp smoked paprika
  • 1/2 tsp dried thyme
  • 1 tbsp Worcestershire sauce
  • 2 cups beef broth
  • 1 tbsp tomato paste
  • 1 large onion, sliced
  • 3 cloves garlic, minced
  • 4 large carrots, chopped
  • 4 celery stalks, chopped
  • 1 lb Yukon gold or baby gold potatoes
  • 1 – 2 tbsp cornstarch

Print This Recipe Print This Recipe

Directions


Pat the mock tender roast dry with paper towels. Trim off any silverskin or tough membrane if present. Season all sides with salt, pepper, garlic powder, onion powder, smoked paprika, and thyme.


Heat 2 tablespoons of olive oil in a skillet over medium-high heat. Once hot, sear the roast for 2–3 minutes per side until a rich brown crust forms. Transfer the seared roast to a tray or plate.


Optional: Overnight Prep with Food Safety Guidance
If you’re cooking the next day, let the seared roast cool for no more than 30 minutes at room temperature, uncovered or loosely tented with foil. Once no longer steaming, place the roast in the refrigerator on a shallow tray to cool completely. This helps it pass safely through the “danger zone” (40°F to 140°F) within USDA guidelines.

Allow the seared roast to cool in the refrigerator for at least 1 hour. Once cooled below 40°F, you can place it into the slow cooker insert with raw or sautéed vegetables and refrigerate the whole insert overnight. Make sure everything is fully chilled before storage. This saves time in the morning and remains safe if cooled properly.


In the same skillet, lower heat to medium and sauté sliced onions for about 3 minutes. Add the minced garlic and cook for 30–60 seconds until fragrant. If needed, deglaze the pan with a splash of beef broth to release browned bits. Once softened and golden, remove the aromatics from heat.


In the slow cooker insert, layer the chopped carrots and celery on the bottom. Place the seared roast on top, then add the sautéed onions and garlic over the meat.
If you’re prepping this the night before, wait to add the potatoes until the next morning—cubed raw potatoes can oxidize overnight, turning brown and looking unappetizing. For best results, chop and add the potatoes just before you start cooking.


In a small bowl, whisk together the beef broth, Worcestershire sauce, and tomato paste, then pour the mixture over the roast and vegetables when you’re ready to cook.


Cover and cook on LOW for 7–8 hours until the roast is fork-tender and the vegetables are soft. If needed, add an extra hour for tougher cuts.


Once done, remove the roast and vegetables. Tent the roast with foil and let rest 10–15 minutes before slicing. Transfer the remaining liquid in the slow cooker to a saucepan on the stovetop over medium-high heat.


To thicken the gravy, mix 1 tablespoon cornstarch with 2 tablespoons cold water. Whisk the slurry into the simmering liquid and stir until it bubbles and thickens. Add more slurry if needed. Note: Cornstarch must reach 203°F to activate, so thickening is best done on the stovetop—not in the slow cooker.


Slice the roast against the grain or into bite-size pieces. Return the meat and vegetables to the gravy or serve everything separately. Enjoy!


Print This Recipe Print This Recipe

Watch How To Make This Recipe


Dutch Oven Sirloin Tip Roast

Dutch Oven Sirloin Tip Roast


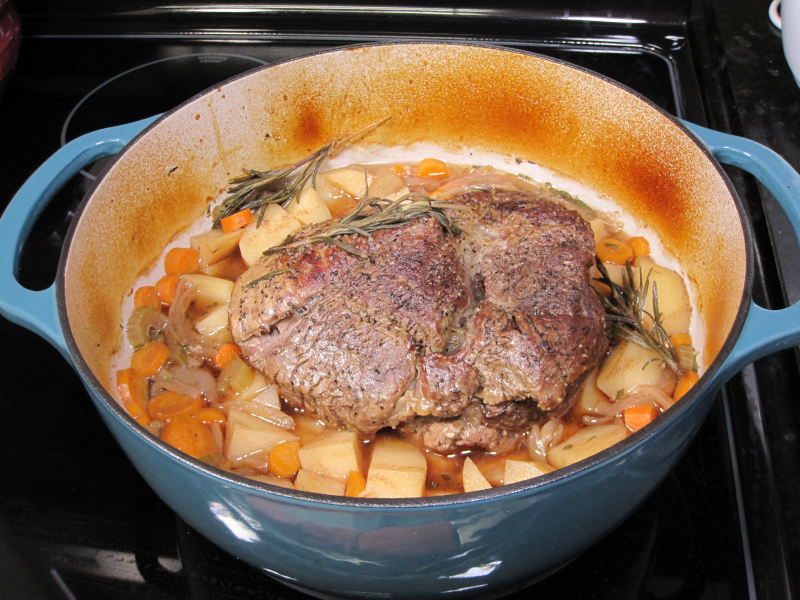
If you’re looking for a hearty, comforting meal that delivers deep, savory flavor, this Dutch Oven Braised Sirloin Tip Roast is an excellent choice. It’s a slightly leaner alternative to the classic chuck roast while still offering a rich, beefy taste complemented by aromatic vegetables and a silky gravy. With carrots, celery, potatoes, fresh rosemary, and a splash of Worcestershire sauce, this dish is the perfect combination of rustic charm and home-cooked satisfaction.

The braising method in a Dutch oven creates a tender roast with just enough structure to slice cleanly while soaking up all the rich cooking juices. While sirloin tip is naturally leaner than chuck, this cut still becomes wonderfully tender after a slow cook at 300°F. The vegetables cook beautifully with the broth, infusing it with sweetness and earthiness, while the rosemary adds a fragrant note that ties it all together.

This recipe shines for weeknight family dinners or weekend gatherings where you want something warm, filling, and sure to please a crowd. Plus, with the option to make a light, velvety gravy from the braising liquid, every slice of beef and every forkful of vegetables is coated in pure comfort. Serve it straight from the Dutch oven for a rustic presentation, and you’ll have a meal that feels classic yet polished.

Ingredients

  • 3 pounds sirloin tip roast
  • 4 carrots, peeled and chopped into chunks
  • 3 celery stalks, sliced into strips
  • 1 white onion, sliced into strips
  • 3 garlic cloves, minced
  • 2 russet potatoes, halved or quartered
  • 3 sprigs fresh rosemary (mince 1 sprig for vegetables)
  • 2 cups beef broth (or 1 can, ~14.5 oz, for a lighter gravy)
  • 1 tablespoon Worcestershire sauce
  • 1 teaspoon kosher salt
  • 1 teaspoon black pepper
  • 2 tablespoons olive oil
  • 1 tablespoon cornstarch (plus extra if needed)
  • ½ cup red wine (optional, to enhance depth of flavor during deglazing)

Print This Recipe Print This Recipe

Directions

Preheat oven to 300°F. Pat the sirloin tip roast dry with paper towels. Season generously with salt and pepper on all sides.


Heat a 6-quart (or larger) Dutch oven over medium-high heat. Add olive oil, then sear the roast for about 4–5 minutes per side until a deep brown crust forms. Transfer the roast to a plate and set aside.


Reduce heat to medium. Add sliced onion, carrots, and celery. Sauté for 8–10 minutes until onions are translucent and lightly browned. Stir in the minced garlic and minced rosemary. Cook for 1 minute, stirring to prevent burning.


Pour in ½ cup red wine (optional) or a small portion of the beef broth. Scrape the bottom of the pot with a wooden spoon to release any browned bits. Add Worcestershire sauce and rosemary sprigs. Bring to a gentle simmer.


Add the potatoes, then return the seared roast (and any juices) to the Dutch oven. Add the remaining beef broth. Cover with the lid and transfer to the oven. Braise for 3 hours at 300°F without opening the lid.


Remove the roast and vegetables. Tent the beef with foil to rest for 15 minutes. Bring the Dutch oven with braising liquid to medium heat on the stovetop. Mix 1 tbsp cornstarch with 1½ tbsp cold water and whisk into the liquid. Simmer for 5–10 minutes, stirring occasionally, until it lightly coats the back of a spoon. For a thicker gravy, repeat with an extra ½ tbsp cornstarch slurry.


Slice the roast against the grain or break into chunks for a pot roast-style presentation. Return the beef and vegetables to the Dutch oven, coating them in the gravy. Serve hot, directly from the pot or transfer to a serving platter.

Alternative Method:
For firmer vegetables, braise the roast for 2 hours before adding carrots and potatoes. After 2 hours, nestle the vegetables around the roast, cover, and continue braising for 1 to 1.5 hours until tender. This results in a slightly firmer vegetable texture while maintaining a fully tender roast.

Print This Recipe Print This Recipe

Watch How To Make This Recipe


Grilled Corned Beef And Cabbage

Grilled Corned Beef And Cabbage


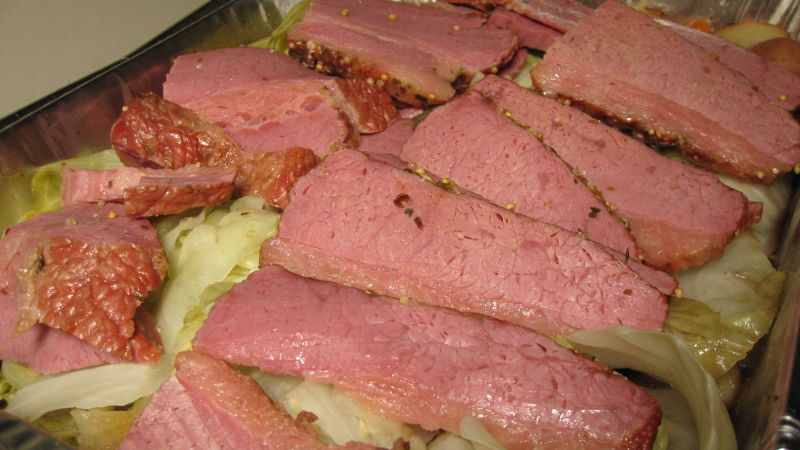
Grilled corned beef and cabbage takes a traditional comfort dish and elevates it with rich, smoky flavors and a perfectly balanced texture. Slow-cooked with lump charcoal and infused with Guinness Stout and beef broth, this recipe creates a deeply flavorful brisket with tender, braised vegetables. By carefully managing heat zones on the grill, the beef achieves a beautiful crust while staying juicy and flavorful inside, while the vegetables absorb all the savory goodness from the cooking liquid.

The secret to making this dish truly stand out is in the technique. The corned beef is seasoned, smoked, and then braised to develop the perfect texture. Meanwhile, the carrots, red potatoes, cabbage, and onions are cooked separately, allowing them to reach the ideal tenderness without becoming mushy. This method ensures every bite is packed with bold, well-balanced flavors, while keeping the vegetables firm yet fork-tender.

Whether you’re preparing this for a St. Patrick’s Day feast or simply want a satisfying meal cooked over live fire, this recipe delivers smoky, savory perfection.

Ingredients

  • 1 (3 pound) corned beef brisket
  • 12 oz baby carrots
  • 3 pounds red potatoes
  • 1 large yellow onion
  • 1 head of cabbage
  • 2 cups beef broth
  • 1/2 bottle Guinness Stout

Print This Recipe Print This Recipe

Directions

Remove the corned beef from the package and rinse it thoroughly to remove excess brine (optional but recommended for better seasoning absorption). Pat dry and rub with 1 tablespoon of yellow mustard to help the seasoning stick. Using a mortar and pestle, grind the seasoning packet and mix it with 1 tablespoon black pepper and 1 tablespoon garlic powder for extra depth. Apply half the seasoning mix evenly over all sides of the beef.


Set up a two-zone fire on your grill (indirect heat for smoking and direct heat for later adjustments). Add lump charcoal and a few wood chunks (oak or hickory preferred) for additional smoke flavor.
Place the corned beef on the cooler side of the grill (indirect heat) and smoke at 250°F for 2 hours.


After 2 hours, transfer the brisket to a small aluminum pan and pour in 1 can of beef broth and ½ bottle of Guinness Stout. Insert a meat probe into the thickest part of the brisket and cover the pan with foil, leaving room for the probe wire to exit. Move the pan closer to the fire but not directly over it, maintaining a stable 250°F temperature. Allow the internal temperature of the brisket to reach 175-177°F, then remove from heat. Wrap the beef in butcher paper and a towel, placing it in a small cooler to rest.


While the beef rests, add the chopped vegetables (potatoes, carrots, onion, and cabbage) to the foil pan used for the brisket. Keep the juices in the pan and cover with foil then place over indirect heat on the grill for 1 hour. After 1 hour, move the pan directly over the fire and cook for another 45 minutes to 1 hour, until the vegetables are fork-tender.


Slice the rested corned beef against the grain for the most tender texture. Serve with the cabbage, carrots, potatoes, and onions, drizzling extra braising liquid over the top for added moisture.

Print This Recipe Print This Recipe

Watch How To Make This Recipe


Dutch Oven Stuffed Green Peppers

Dutch Oven Stuffed Green Peppers


Stuffed bell peppers are a classic comfort dish that brings together bold flavors and a satisfying, hearty texture. With a savory filling of seasoned ground beef, tender rice, and melted mozzarella cheese, these stuffed peppers are baked to perfection in a rich tomato sauce. The slight sweetness of roasted bell peppers perfectly balances the deep, savory flavors of the filling, making each bite irresistible.

This recipe takes things up a notch by incorporating Montreal steak seasoning for an extra punch of bold flavor, while fresh Roma tomatoes add a layer of natural sweetness and acidity. The peppers bake in a covered Dutch oven, locking in moisture and ensuring that each bite is juicy and tender. The final touch? A golden-brown layer of bubbly, broiled mozzarella cheese that adds the perfect amount of creaminess and depth to this already delicious dish.

Whether you’re making these for a weeknight family dinner or impressing guests with a comforting homemade meal, these stuffed bell peppers are sure to satisfy.

Ingredients

  • 1 pound ground beef
  • 6 bell peppers
  • 1 cup cooked rice
  • 3 cloves garlic, minced
  • 1 onion, chopped
  • 2 plum/Roma tomatoes, diced
  • 1 tablespoon Worcestershire sauce
  • 1 teaspoon Italian seasoning
  • ½ teaspoon Montreal steak seasoning
  • 15 oz can tomato sauce
  • 8 oz mozzarella cheese, ball or shredded
  • 1 tablespoon olive oil (for sautéing)

Print This Recipe Print This Recipe

Directions

Cook 1 cup of rice according to package directions. Set aside. Preheat the oven to 350°F (175°C). Cut the tops off the bell peppers and remove the seeds and membranes. Dice the tops of the peppers (except the stems) to use in the filling.


Heat 1 tablespoon of olive oil in a Dutch oven over medium heat. Add the chopped pepper tops and onion. Sauté for about 7 minutes until softened. Add the ground beef and break it apart with a wooden spoon. Cook until browned, about 5 minutes. Remove excess grease from the Dutch oven.


Add Italian seasoning, Montreal steak seasoning, Worcestershire sauce, 1 teaspoon salt, and ½ teaspoon black pepper to the beef mixture. Stir well. Stir in the diced tomatoes and cook for 2 minutes. Add the minced garlic and cook for another minute until fragrant. Stir in the cooked rice and tomato sauce, mixing well. Use a wooden spoon to scrape any browned bits from the bottom of the pot. Remove from heat and transfer the mixture to a bowl.


Lightly coat the bottom of the Dutch oven with a thin layer of olive oil to prevent sticking. Place the bell peppers upright in the Dutch oven. Fill each pepper halfway with the meat mixture. Add a layer of mozzarella cheese (shredded or cubed), then continue filling until the peppers are full. If any meat mixture is left over, spread it around the peppers at the bottom of the Dutch oven. Sprinkle additional Montreal steak seasoning and Italian seasoning on top of the stuffed peppers. Cover the Dutch oven with a lid and bake for 45 minutes.


Remove the lid and top the peppers with sliced or shredded mozzarella. Return to the oven and broil for 1–3 minutes until the cheese is melted and golden brown. Let the stuffed peppers cool for 10 minutes before serving.

Print This Recipe Print This Recipe

Watch How To Make This Recipe