


Pellet Smoked Spinach Artichoke Dip
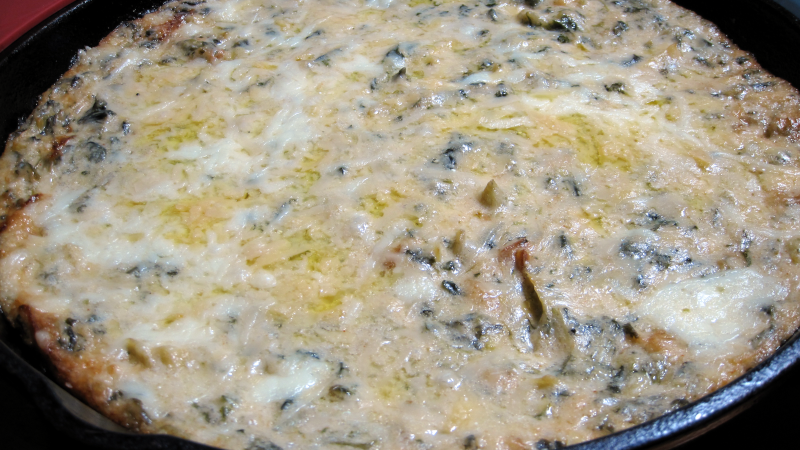
Who doesn’t love a good spinach artichoke dip when you are watching “The game that lawyers won’t let us mention”. But have you ever tried a smoked version of this dip? Sure we all know what the TGI Friday’s Chili’s Applebee’s Ruby Tuesday’s (RIP) local sports bar dip is like and heck it ain’t that bad… usually. But there is something special about a smoked version of this dip with your own hand selected cheeses. One could only guess how your favorite restaurant prepares their dip, maybe it’s all a frozen pre-mix in a plastic bag. But you have a pellet smoker and free will so you can make some fresh and delicious smoked dip! The good part about this recipe is that you can do all the prep work a day or two ahead of the cook day. When you are ready, all you need to do is put this dip on your smoker and enjoy.
Man That’s Cooking
Ingredients
- 14 oz can artichoke hearts
- 10 oz frozen spinach
- 1 cup sour cream
- 1/4 cup mayonnaise
- 8 oz cream cheese
- 8 oz gouda cheese
- 8 oz mozzarella cheese
- 8 oz parmesan cheese
- 1/2 teaspoon garlic powder
- 1/2 teaspoon smoked paprika
- 1/4 teaspoon cayenne pepper (optional)
Directions
First, thaw out the frozen spinach overnight in the refrigerator. On the next day when you are ready to start, remove the cream cheese from the refrigerator and allow it to soften on the kitchen countertop.
Next open the can of artichoke hearts and drain out the water. Using paper towels, squeeze out the excess water from the artichoke hearts. Roughly chop the artichoke hearts and place them in a large mixing bowl.
Next open the package of the thawed out spinach and drain out the water. Using paper towels, squeeze out the excess water from the spinach. The spinach should already be chopped but if not, chop it. Add the spinach to the large mixing bowl.
Next grate the gouda, mozzarella, and parmesan cheese then set aside a small amount from each (about ½ cup total) for a topping and add the rest to a large mixing bowl. Add the softened cream cheese, mayonnaise and sour cream, then mix everything together. Add the spices and mix everything once again. At this point you can cover the mixing bowl with plastic wrap and place it into the refrigerator if you plan to cook the dip the next day.
Preheat your smoker at 250F and use mild pellets such as apple or competition blend. The total smoke time should be at least one hour and 20 minutes but you can cook for longer if desired. Transfer the dip mixture into a 10 or 12 inch cast iron skillet and place this on the smoker when it reaches temp.
Stir the dip every 45 minutes and if you plan to cook for the recommended 1 hour 20, then you will stir the dip just once. If you plan to cook longer, use the 45 minute stirring as a checkup to see how much moisture is lost and don’t allow the dip to get too dry.
20 minutes before you plan to remove the dip, add the 1/2 cup of shredded cheese that was set aside to the top of the dip. Allow this to cook without stirring and let it melt down. Another option you can try is to brown the cheese topping in the oven by placing it on the top oven rack and using the broiler. Set it to high and cook for about 2 – 3 minutes. Do not walk away, always keep an eye on the brown coloring of the cheese.
Allow the dip to cool for at least 5 minutes because it is molten lava hot. Then serve it with corn chips, or pita chips for dipping. For extra fancy stuff you can thinly slice a French baguette and toast the slices in the oven.
 Print This Recipe
Watch How To Make This Recipe
Oven Roasted Eye Round Roast
Oven Roasted Eye Round Roast
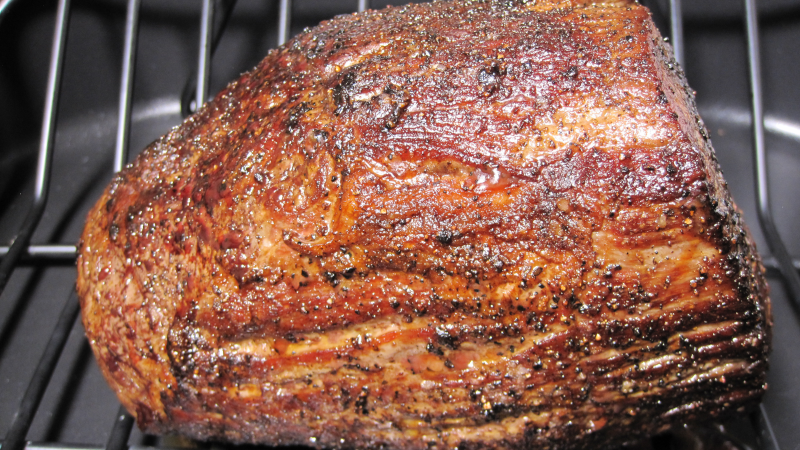
Roast beef can be made from a variety of cuts, and one of the best budget-friendly options is eye round roast—especially when it’s on sale at your local market. This recipe makes it easy to turn that lean cut into something flavorful and tender. While it’s simple to prepare, a digital meat thermometer (wired or wireless) makes a big difference in getting perfect results. Since this method relies on precise internal temperatures, you’ll want to avoid opening the oven door repeatedly, which makes handheld thermometers less ideal. A cast iron skillet is also helpful for getting a great sear before roasting. Once you’re set up with those basic tools, you’re ready to make roast beef at home that rivals the deli counter!
Man That’s Cooking
Ingredients
- 3.5 – 4.5 lb eye round roast
- 3 tsp kosher salt
- 2 tsp black pepper
- 2 tbsp olive oil
Directions
Salt all sides of the roast then wrap it in plastic wrap and refrigerate overnight.
Set the rack in the oven to the medium position. Preheat the oven to 225 F.
Dry the roast with paper towels, then rub it down with olive oil. Apply black pepper to all sides of the roast.
Heat a 10 or 12 inch cast iron skillet on medium high heat with a tablespoon of oil. When the oil starts smoking, sear the roast on each side for 3 minutes per side.
Transfer the roast to the rack in a roasting pan and roast in the oven until the center reaches 115°F. For reference, a 4-pound roast took about 1.5 hours at 225°F to reach this temperature. That works out to roughly 22 minutes per pound, but please keep in mind: this is a cook-by-temperature recipe, so times are just estimates. Oven performance, roast shape, and fridge chill can all affect how long it takes. A digital thermometer will give you the most accurate results.
Turn the oven off (but don’t open the door!) and let the roast continue cooking with the residual heat until it reaches 130°F internally. For a 4-pound roast, this final step took about 30 minutes, or roughly 7.5 minutes per pound. Once the roast reaches temp, remove it from the oven and let it rest for 15 minutes. Then slice thinly and enjoy—especially with a good horseradish sauce!
Print This Recipe
Watch How To Make This Recipe
Pellet Smoked Cajun Butter Turkey
Pellet Smoked Cajun Butter Turkey
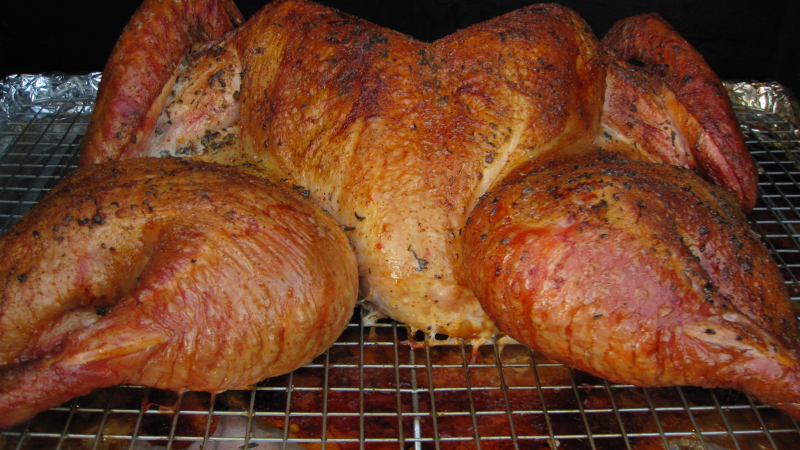
Holiday time is here again and your family is looking forward to your smoked turkey. And this year it’s time to give them a different flavor of buttery creole goodness. Now don’t worry, this is not spicy and grandma won’t need a tall glass of milk to cool down the burn. This recipe uses Tony Chachere’s cajun butter injection which has a very buttery flavor with a little bit of kick. If you haven’t tried this before, you should give it a taste before injecting so you know what you are working with. But that’s not all, we’re going to add a creole seasoning herb butter underneath and on top of the turkey skin! Just smoke it for a few hours at 250F then crank the heat to 375F to crisp up the skin. Take it off the smoker when the breast hits 165F, let it rest, then slice in and be amazed at how juicy this turkey is.
Man That’s Cooking
Ingredients
- 10 – 15 lb whole turkey
- 1 bottle Tony Chachere’s cajun butter injection
- 1 stick unsalted butter
- 1 tsp fresh rosemary
- 1 tsp fresh sage
- 1 tsp fresh thyme
- 3 – 5 tbsp Tony Chachere’s creole seasoning
Directions
Thawing
Usually your turkey will be fully frozen and if so let it thaw out in the refrigerator for at least 48 hours.
Spatchcocking
When the turkey is thawed, remove it from the packaging and remove any giblets and pop up thermometers. Next, cut out the backbone using kitchen shears or a chef’s knife. Cut from the tail along the side of the backbone up to the neck. Repeat this step on the other side of the backbone and remove it completely. Following this, cut the breastbone in the center and now you can flatten out the turkey. This flattening of the bird is called spatchcocking and it will allow the breast and thigh meat to reach their finishing temperatures at the same time. And don’t throw way that backbone, it’s perfect for making gravy or turkey broth!
Injecting
For this recipe, we are using a bottle of Tony Chachere’s cajun butter injection. You may end up using only half the bottle per turkey so pour the injection into another container and do not stick your injection needle directly into the bottle. That will cross contaminate the injection liquid with raw turkey and besides that, it’s just easier to use a wider mouth container. Use your injection needle to pump the turkey up with all the injection liquid as possible. Inject the thighs, legs, wings and breasts and move the needle around to inject multiple points. Putting too much liquid in one area will create a pocket of injection, which is not a bad thing but will be noticeable.
Butter Rub
Use one stick of room temperature unsalted butter and mix with 1 tablespoon of Tony Chachere’s creole seasoning. Add about a teaspoon each of fresh chopped sage, thyme, and rosemary then mix everything together. Next use a small silicone spatula to separate the skin from the meat starting at the neck area and working around to the thighs. Next you can put some seasoned butter on the spatula and work it down underneath the skin. Use your fingers above the skin to spread the butter around. If you are careful you can separate the skin from the thigh meat and get some seasoned butter there as well.
Seasoning
Flip the turkey over and use Tony Chachere’s creole seasoning to coat the inside of the turkey. You can be heavy handed with the seasoning if you like, this is a big piece of meat! Flip the turkey back over and season the skin side. Next rub on the remaining seasoned butter then add the remaining herbs. Add one light coat of creole seasoning for good looks and flavor.
Smoking
Turkey can be smoked at temperatures ranging from 225F up to 325F. However there are some food safety concerns when smoking a turkey larger than 15 pounds at 250F or less. For this recipe we recommend using a turkey less than 15 pounds and smoking at 250F using a wood such as apple, pecan or hickory. Your total cook time will vary depending on the total weight of the turkey and cooking temperature. A 14 pound turkey would take around 4 hours more or less of cook time. The problem with a smoke temperature lower than 300F will be rubbery skin or at least skin that is not crisp and possibly chewy. To help fix this, you will need to crank up the heat of your smoker to 375F when the breast reaches an internal temp of 150 – 155F. Let the turkey continue to cook and when the turkey reaches around 165F in the breast and 175F in the thigh, remove it from the smoker and let it rest uncovered. If you cover the turkey for too long, the steam will work against you and moisten the skin. Just let it rest 15 minutes to allow carryover cooking to do it’s job and work the juices around. After resting, carve into that turkey and be ready to deal with a cutting board full of juices!
Print This Recipe
Watch How To Make This Recipe
Buttery Stuffing
Buttery Stuffing
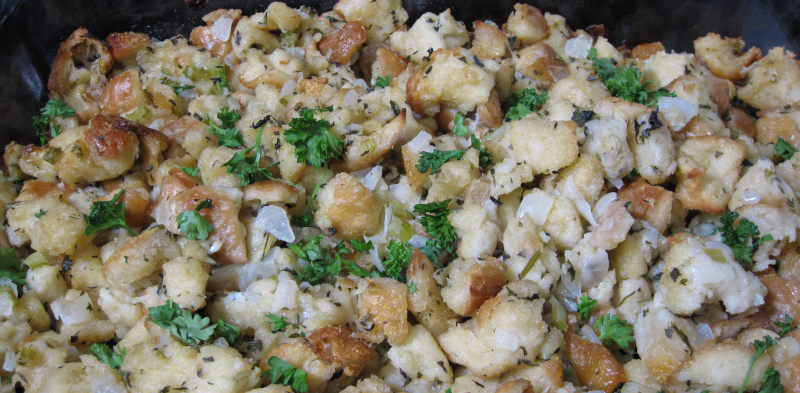
Every holiday meal needs a good homemade stuffing. Of course this takes more effort than making instant stovetop stuffing, but the flavor and texture is so much better. This recipe is based on typical classic stuffing recipes but we added more butter for a fluffy croissant taste. Of course you could modify this recipe as you like to match your taste. If you are short on time, you can do all the chopping and dicing a day ahead of time. You can also dry out the bread a day before and store it in large zip seal bags. When it’s time to cook the stuffing mixture, keep in mind you will need at least 1.5 hours baking time. You can get this done early on the holiday and just warm it up when your main dish is ready. One thing is certain, once you make home made stuffing, this will be a repeat dish every year!
Man That’s Cooking
Ingredients
- 1 lb sourdough bread
- 4 celery stalks
- 1 yellow onion (medium)
- 3 garlic cloves
- 1 cup (2 sticks) unsalted butter
- 1 tsp fresh sage
- 1 tsp fresh thyme
- 1 tsp fresh rosemary
- ½ cup fresh parsley
- 2 eggs
- 2 cups (or 14.5 oz can) chicken broth
Directions
First, preheat the oven to 250F. Next use a bread knife and cut the bread into ½ inch slices. Cut each slice into 3 – 4 strips roughly ½ inch wide. Finally, stack the 3 strips together and slice out ½ inch cubes. Spread the cubes flat on several cookie sheets without stacking any bread on top of eachother. Place the cookie sheets in the oven for 20 minutes then remove them and check the bread cubes for any moisture. All cubes should be solid and not squishy. If any are squishy, continue to bake them for another 20 minutes. Repeat this until all bread cubes are solid, then remove the bread and increase the oven temperature to 350F.
While the bread is baking, chop the onion, celery and herbs. Set aside unchopped parsley for a final topping. Melt the butter in a large skillet over medium heat. Add the onion and celery and cook for 8 minutes stirring occasionally. Add the garlic and herbs then cook for 1 minute more then remove the skillet from the heat.
Transfer the bread cubes to a large bowl. Pour about ⅓ of the melted butter onion mixture over the bread and toss to coat evenly. Pour another ⅓ and mix again. Repeat once more with the remaining butter mixture.
In a medium bowl, mix together the eggs and chicken broth. Pour ⅓ of the mixture over the bread and toss again to coat evenly. Repeat twice more then transfer the bread to a greased 9 x 13 baking dish. Cover with foil and bake at 350F for 45 minutes. Uncover and stir the stuffing. Cook uncovered for another 20 minutes then stir the stuffing again checking for moisture and brown coloring on the bread. The bread should be brown and partially moist but not soaked and uncolored. Repeat this 20 minute cook several times if needed. When the bread reaches your desired doneness, rest for 5 minutes then top with the parsley that was set aside.
Print This Recipe
Watch How To Make This Recipe
