Pellet Smoked Poblano Chorizo Dip
Nothing beats a smokey cheesy meaty dip and this recipe brings all these delicious flavors together perfectly. This recipe requires a little bit of work and it yields a large amount but that’s a good thing right? Be sure to buy an extra bag of tortilla chips!
Man That’s Cooking
Ingredients
- 4 poblano peppers
- 1 white onion
- 1 jalapeno pepper
- 20 oz chorizo (5 links)
- 8 oz cream cheese
- 8 oz cheddar cheese
- 8 oz colby jack cheese
- 8 oz pepper jack cheese
- 1 1/2 cups sour cream or greek yogurt
- 2 cans refried beans
- 1 teaspoon chili powder
- 1 teaspoon cumin
Directions
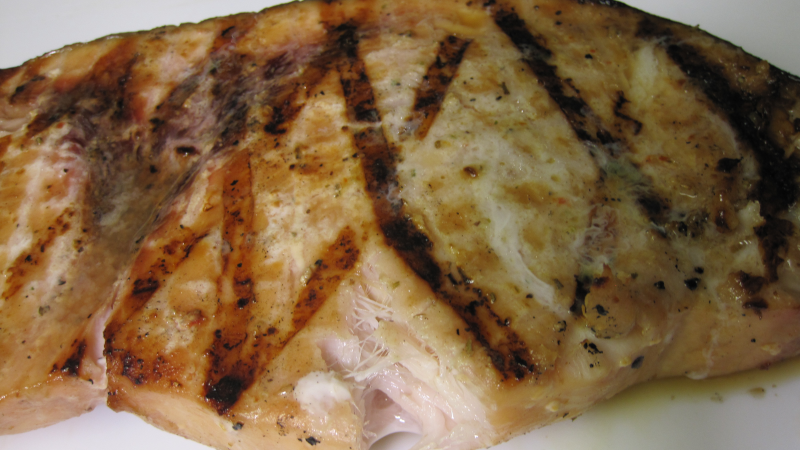
First, fire up the grill and allow it to heat on low. Peel the onion and cut it into 3 thick slices. Rub a light coat of olive oil on the onions and poblano peppers. When the grill reaches temp, add the onion, poblanos, and chorizo. Cook for about 6 to 10 minutes then flip everything to the other side and continue cooking. The poblanos will finish first, and should be removed when the skin on both sides is browned. After removing the peppers, place them in a plastic bag to steam off the skin. The onions will finish next followed by the chorizo when it reaches 165 F in the center.
While you are grilling, shred the cheddar, pepper jack, and colby cheeses and add it to a large bowl. Slice up the cream cheese into small chunks and add to the bowl. Add the greek yogurt / sour cream to the bowl and stir the contents until mixed.
After the peppers have steamed for 10 minutes, remove the outer skin layer from the peppers and discard. Remove the pepper stems and seeds, then dice the peppers and add them to the bowl. Dice the cooked onion and add it to the bowl. When the chorizo is done cooking, let it cool for a few minutes then remove the casing and chop the meat. Add the chorizo to the bowl and mix the contents of the bowl thoroughly.
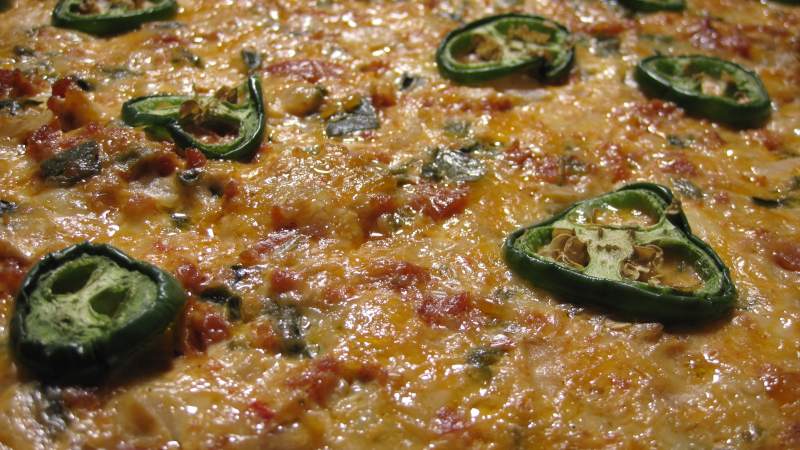
Next spread around the 2 cans of refried beans on the bottom of a 13 inch skillet or foil lasagna pan. Spread the cheese poblano chorizo mixture on top of the refried beans. Slice the jalapeno thinly and place the slices on top of the cheese.
Preheat your pellet smoker at 250F using apple or pecan wood. Smoke the cheese dip for at least 1 hour. You can smoke longer if you like, just pay attention to the top layer of browning cheese and make sure it does not get too tough and overcooked.
 Print This Recipe
Watch How To Make This Recipe